MEGAN LEARNS TO COOK: CAKE CAKE CAKE
I’m not the baker friend (or cook as we know), but I really want to be. Well, at least through this whole “Megan Learns to Cook” journey, I really want to master childhood favorites and be able to make anyone a cake!
I’ve made one birthday cake in my life. It was a panda cake from Coco Cake Land for my sister Madison’s 22nd birthday. I remember being SO nervous. I’d love to be able to confidently make anyone a simple but beautiful cake without panicking, so that’s what we are making today! Let’s make (and eat) some cake.
Spring is in full swing so I thought it would be fun to make a citrus cake. My sister suggested I try the Sunshine Citrus Cake from Sally’s Baking Addiction.
Let’s Bake!
My first step was to gather all the ingredients I needed. I guess I haven’t baked in a while because my baking powder expired in 2022 (oops). I followed all the steps pretty exact, except there was one big change. I used the 6” pans I already owned (which are heart shaped) and evenly distributed the batter between 2 instead of 3 pans. Once I gathered all the ingredients I was ready to go! I would say this cake is a step above, level-wise, of cakes I’ve made before. There’s a filling involved where you’ll make a lemon curd and multiple layers. But it was worth it! This citrus came through in such a nice way that didn’t overtake you. It was delicate with an almost refreshing zest that is perfect for spring!
Things I LearneD
You’ll need a zester! I tried using a grater once, and it’s not even close. So it’s worth getting one! I actually use mine quite often.
Do as much prep as you can! Gather your zest and citrus juice and set aside. Pay attention to which items need time to reach room temp, like the unsalted butter, which can come out first and sit on the counter while gathering items.
If you don’t have a double boiler you’ll need a pot and heat safe bowl. Fill pot with two inches of water, let it come to a boil, then bring to a simmer. Place a heat safe bowl (where your ingredients will go) on top of the pot, making sure it doesn’t touch the water!
Using a pencil, trace your pan on the parchment paper, then cut on the inside of the trace. This should make a pretty close to perfect parchment layer for the bottom of your cake!
Don’t overdo it on the filling! I did, and it was pouring out everywhere, so I had to scrape it down.
Don’t miss the crumb coat! It’s suggested in the recipe that you add a thin layer of frosting and let the cake sit in the fridge for half an hour to secure the structure, and it’s very helpful!
Having a turn table is a game changer! I was able to make a make shift one. I have a small elevated serving platter that the cake plate fit perfectly on!
I used a bench scraper for the first time, and it was so helpful! My cake was a little short, so the scraper was a little tall, but I managed. I think I’ll get better over time.
I may have over whipped my icing. I found it a little runny to work with. Make sure you keep a close watch on it while whipping it.
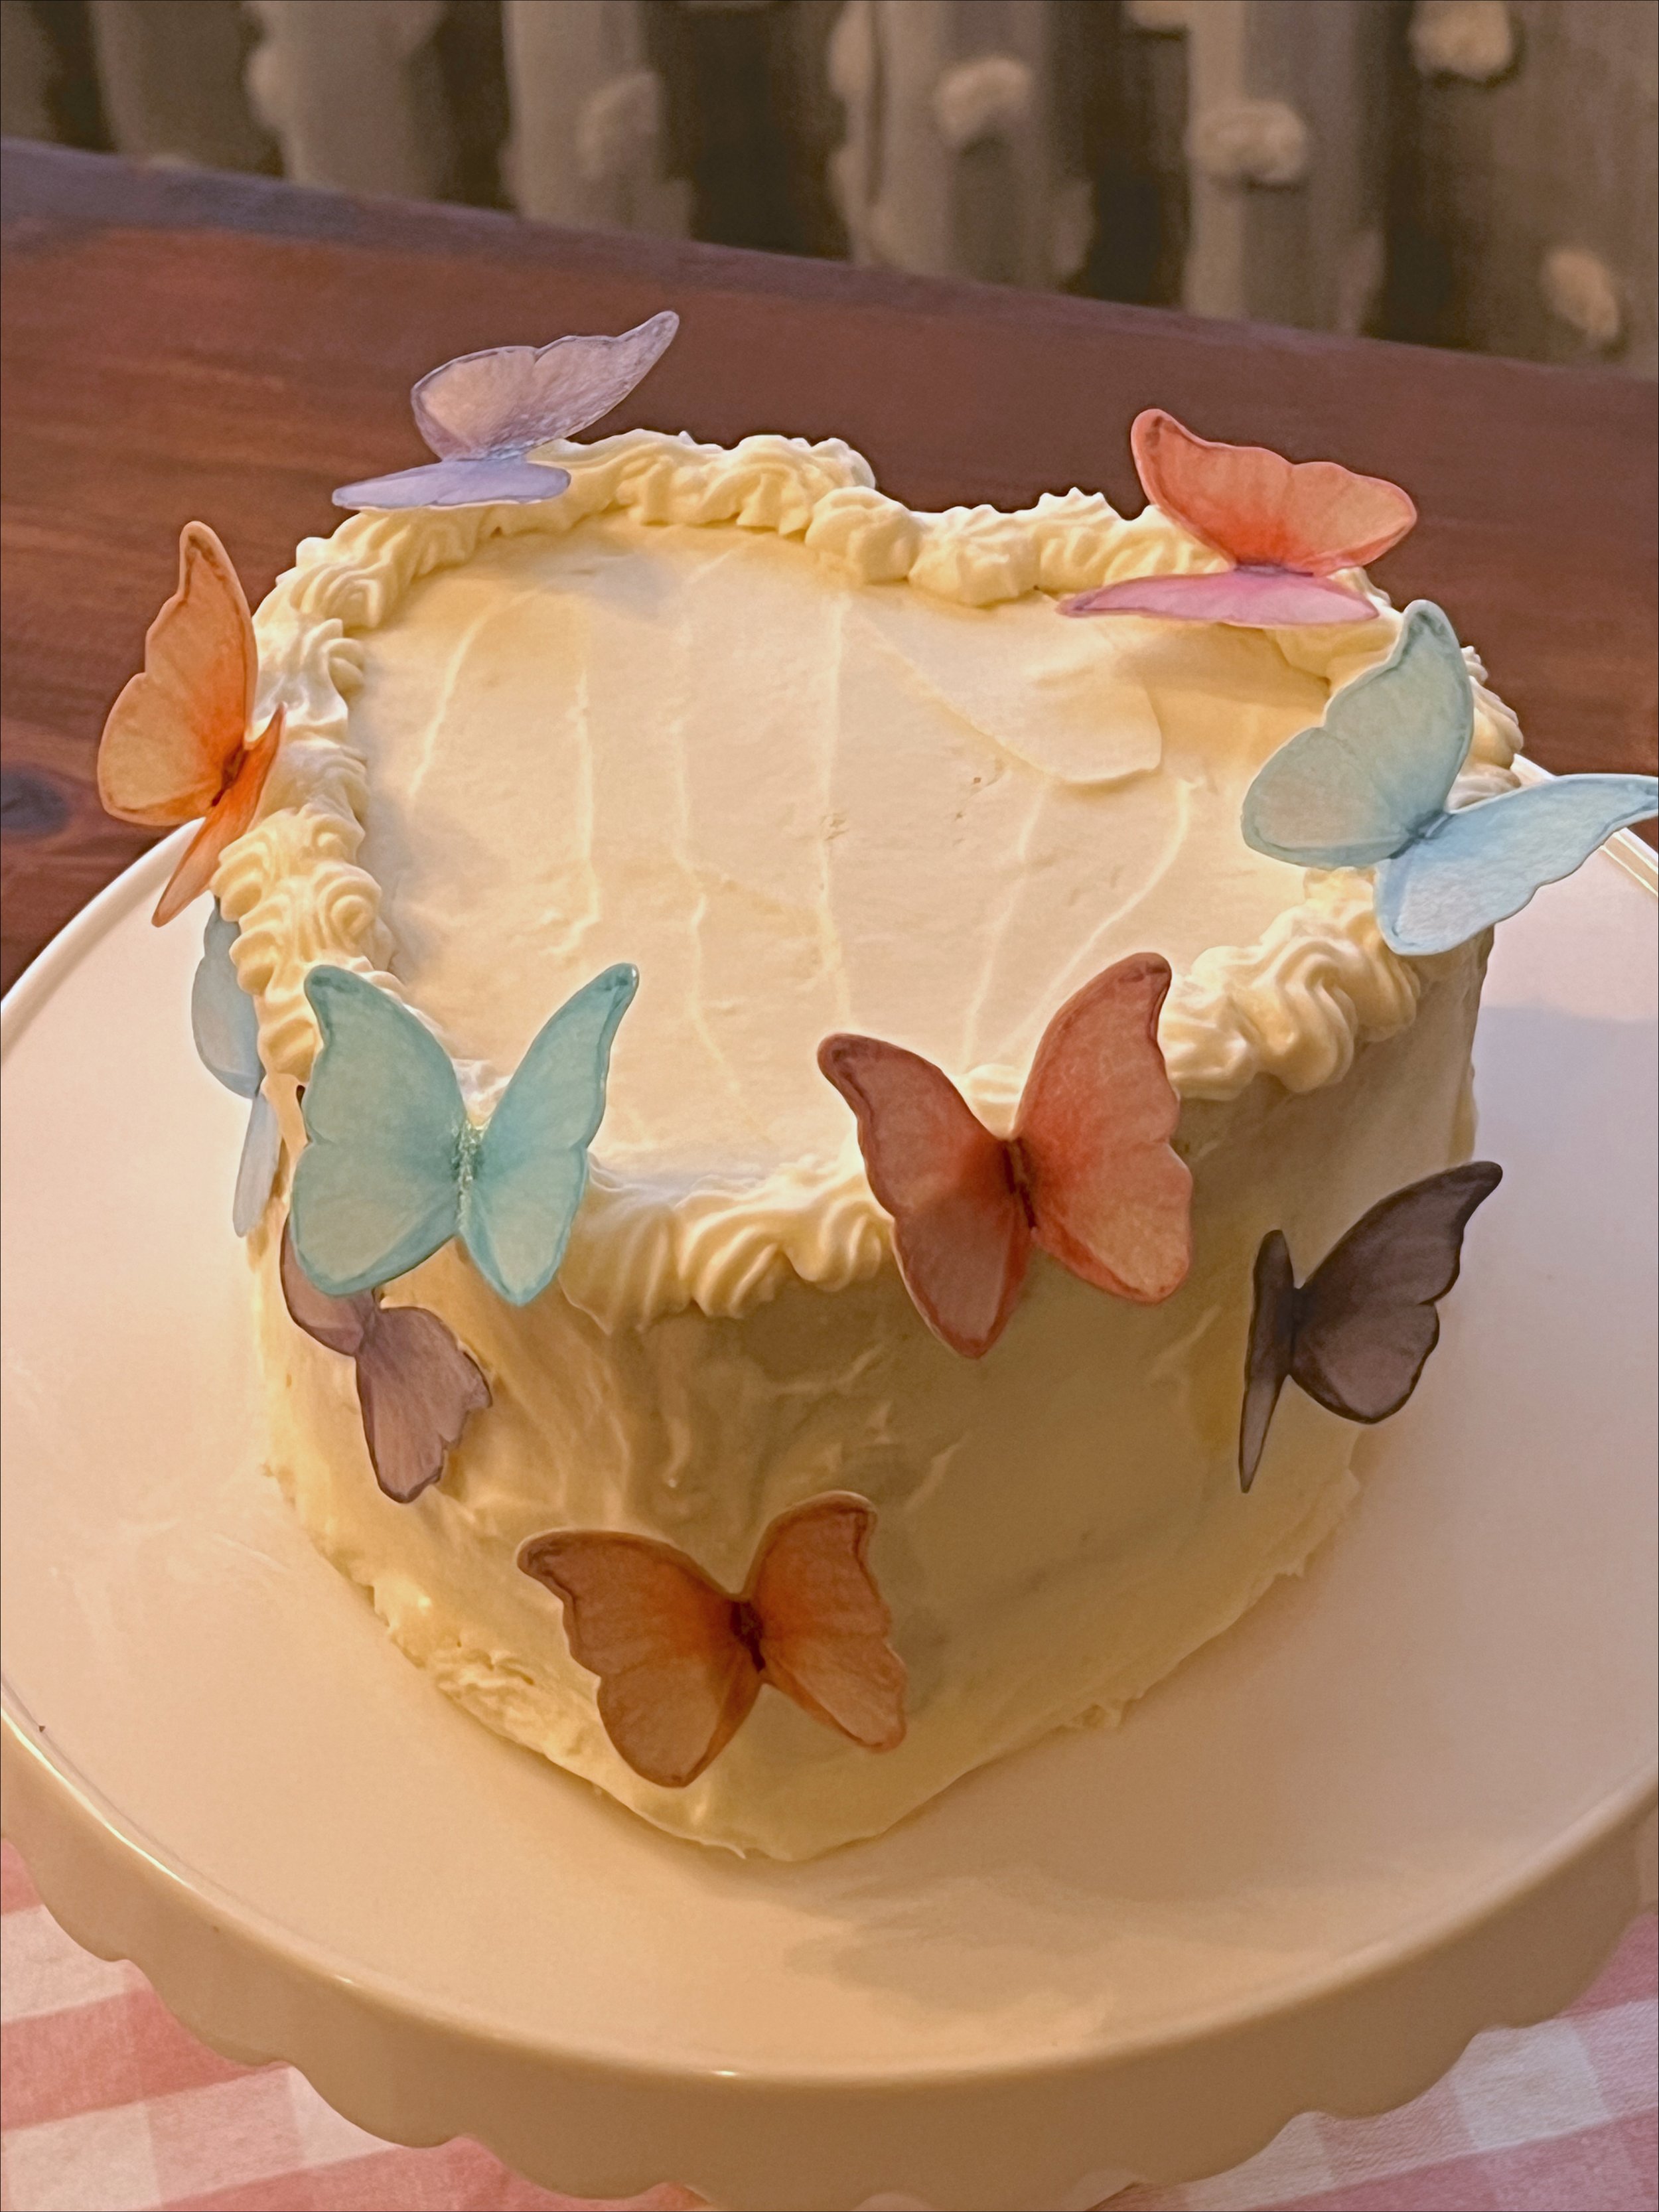
When it doubt, add cute embellishments! I ordered these edible butterflies on amazon and loved the way they looked on the cake!
Next time I’ll try for the three layers! But overall, I was really happy with how this turned out. My icing wasn’t ideal, but hey, I’m here to learn and *hopefully* get better over time.